Adobe Illustrator tips for Sticker printing - Offset paths
Offset paths for sticker design
Offset paths are quite an essential part of sticker design – whether it is putting a nice border on your sticker, or putting a cut path out for when we kiss cut your stickers. In many cases, offset paths will need to be included in your sticker artwork files and these can be easily created using adobe illustrator.
We love adobe illustrator – it allows us to print the best quality stickers for you – and as our saying goes “good art makes great stickers”.
In this little sticker nerd write up, we will run you through the first of a couple things we use all the time – and will help make your adobe illustrator experience all the better.
Creating offset paths
Say we want to put a baby blue border around this camera icon…
Step 1
The first step is to copy it – select the whole design and copy it to the front – CMD F on a mac. Using the select tool (V), grab it and move it across the screen.
 Step 2
Select the right hand camera, and click the Unite tool in the pathfinder palette.

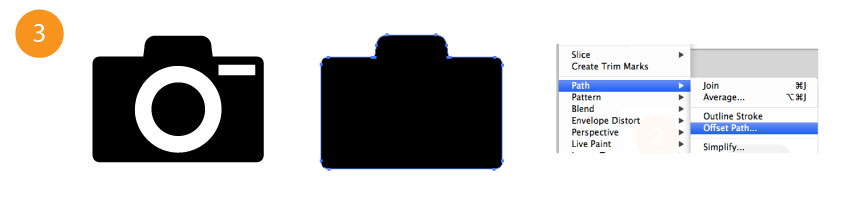
Step 3
Select the new shape, and then head to OBJECT/PATH/OFFSET PATH. Note** – if you have the shapes inside as compound paths, you will need to right click/release compound paths first.
Step 4
In the offset path window choose how wide you want your offset path. In this example, we will choose 3mm. A preview of the sticker border shows up.

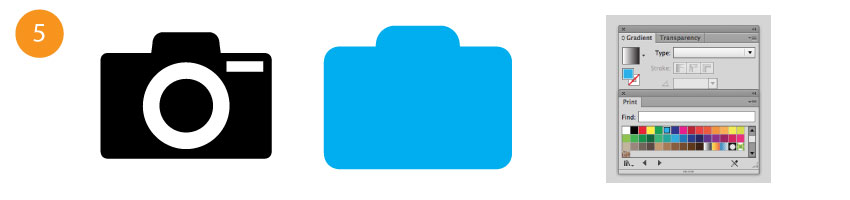
Step 5
Select the whole object. Then, with the fill color selected in the gradient palette, pick your color from the color swatch. After this, click unite again to make the original path and offset path join as one in holy matrimony.
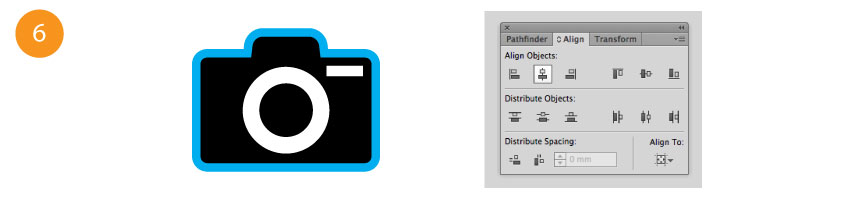
Step 6
Select the original camera, and then the new offset path you have created. Using the align panel, line them up. Make sure that the blue fill is ordered to the back (CMD shift [ ). If it isn’t, it may end up in front.

In the next tutorial, we will show you how to add a cut path to your image – so that we can kiss cut or die cut your stickers to whatever shape you want. If you have any questions about setting up your sticker artwork files the feel free to check out our FAQs page or get in touch.
If you want to buy custom stickers, follow the link!